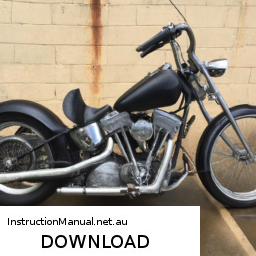
Replacing the lower control arm on a Harley Davidson Shovelhead FL can seem intimidating if you have little mechanical experience, but I’ll break it down into easy-to-follow steps. click here for more details on the download manual…..
Harley Davidson shovelhead FL FX headers true dual aftermarket + mufflers @CustomCruisersLimited Harley Davidson shovelhead FL FX headers true dual aftermarket + mufflers @CustomCruisersLimited Awesome quality Magnum …
ATOMIC POWER FOR YOUR CARB! – Wrecking Crew Panhead For more good stuff check out: https://www.wwag.com GO ATOMIC. It’s a jungle out there. Everyday your carb is in danger of …
Just remember to take your time and make sure you have the right tools and safety equipment. Here’s how to do it:
### Tools and materials Needed
1. **Basic Hand Tools**: Wrenches and sockets (typically 1/2″ and 9/16″), a ratchet, and a screwdriver.
2. **Jack**: To lift the bike safely.
3. **Jack Stands**: To secure the bike once it’s lifted.
4. **Replacement Lower Control Arm**: Make sure it’s the correct part for your model.
5. **Safety Gear**: Gloves and goggles for protection.
### Step-by-Step Instructions
#### 1. Preparation
– **Safety First**: Make sure your bike is parked on a flat, stable surface. Turn off the ignition and remove the key.
– **Gather Tools**: have all your tools and new parts ready so you won’t have to stop in the middle of the job.
#### 2. Lift the Motorcycle
– **Use the Jack**: Place the jack under the frame of the bike in a safe area. Lift the bike until the wheels are off the ground.
– **Secure with Jack Stands**: Once lifted, place jack stands under the frame to support the bike. Never rely solely on the jack for support.
#### 3. Locate the Lower Control Arm
– **Identify the Part**: The lower control arm is connected to the swingarm and the frame. Familiarize yourself with its position.
#### 4. Remove the Old Control Arm
– **Loosen Bolts**: Using the appropriate socket or wrench, loosen and remove the bolts that secure the lower control arm. Keep track of any washers or spacers.
– **Take Out the Arm**: Once the bolts are removed, gently pull the lower control arm from its position. If it’s stuck, you may need to tap it lightly with a rubber mallet.
#### 5. Install the New Control Arm
– **Position the New Arm**: Align the new lower control arm where the old one was located.
– **Insert Bolts**: Put the bolts back in place, along with any washers or spacers you removed. Hand-tighten them first to ensure everything is aligned properly.
#### 6. tighten the Bolts
– **Secure the Arm**: Using your wrench or ratchet, tighten the bolts to the manufacturer’s specifications. It’s important to make sure they’re snug but not overly tight to avoid stripping the threads.
#### 7. Lower the Motorcycle
– **Remove Jack S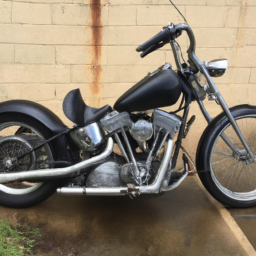 tands**: Carefully take out the jack stands.
– **Lower the Bike**: Use the jack to slowly lower the bike back to the ground.
#### 8. Final Checks
– **Inspect Your Work**: Make sure everything is in place and that the lower control arm is secure.
– **Test Ride**: If you feel confident, take the bike for a short ride to ensure everything is functioning correctly. Listen for any unusual sounds that may indicate a problem.
### Tips
– **Take Your Time**: Don’t rush through the process. If you’re unsure about anything, consult a repair manual for your specific model or seek advice from a more experienced mechanic.
– **Keep Track of Parts**: Use a small container to hold all bolts and small parts to avoid losing them.
### Conclusion
Replacing the lower control arm on your Harley Davidson Shovelhead FL can be done with patience and the right tools. Don’t hesitate to ask for help if you need it, and always prioritize safety when working on your motorcycle. Happy riding!
The parking brake cable, also known as the handbrake cable, is a crucial component in a vehicle’s braking system designed to secure the vehicle when parked. It operates independently of the main braking system, which is typically activated by the foot pedal. The primary function of the parking brake is to prevent the vehicle from rolling, especially on inclines or uneven surfaces, providing an essential safety mechanism.
The parking brake cable typically consists of a steel wire that runs from the parking brake lever, located inside the vehicle, to the rear brakes. When the driver engages the parking brake lever, the cable pulls on the brake mechanism at the back wheels, applying the brakes and holding the vehicle in place. This system can be Either mechanical or hydraulic, but mechanical systems using cables are most common in traditional vehicles.
Over time, parking brake cables can wear out, stretch, or become corroded, leading to reduced effectiveness. Symptoms of a failing parking brake cable may include the brake not holding the vehicle properly, a spongy feeling when the lever is pulled, or visible fraying of the cable. Regular maintenance and inspection of the parking brake cable are essential for ensuring that the parking brake functions correctly, thus enhancing the overall safety of the vehicle. In summary, the parking brake cable is a vital safety component that plays a key role in preventing unintended vehicle movement when parked.