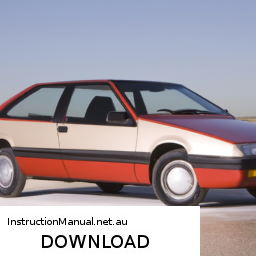
Replacing the wheel bearing on a Citroen BX involves several steps and requires specific tools. click here for more details on the download manual…..
- citroen bx turbo d12 (first look:D) d12 power.
- Check out this scrapped, running and driving Citroën BX #retroclassic #citroenbx #scrapcar
Below is a detailed guide along with the tools needed for the job:
### Tools Required
– **Jack and Jack Stands**: To lift the vehicle safely and hold it in place while you work.
– **Wheel Wrench or Lug Nut Tool**: To remove the wheel bolts.
– **Socket Set**: Including various sizes (typically 10mm, 12mm, and 14mm) to remove bolts and nuts.
– **Torque Wrench**: To ensure that all bolts are tightened to the manufacturer’s specifications.
– **Pry Bar**: helpful for separating components if they are stuck.
– **Hammer or Mallet**: For driving out components where necessary.
– **Bearing Puller**: To remove the old bearing if it is pressed into the hub.
– **Grease**: High-temperature wheel bearing grease for lubrication.
– **Clean Rags**: To wipe down components and keep the workspace clean.
– **Safety Glasses and Gloves**: For personal protection during the process.
### Steps for Wheel Bearing Replacement
– **Preparation**:
– Park the vehicle on a level surface and engage the handbrake.
– Gather all your tools and ensure you have a clean workspace.
– **Lift the Vehicle**:
– Use the jack to lift the front or rear of the vehicle, depending on which wheel bearing needs replacing.
– Secure the vehicle with jack stands to prevent any accidents.
– **Remove the Wheel**:
– Use the wheel wrench to loosen and remove the lug nuts.
– Carefully take off the wheel and set it aside.
– **Access the Brake Components**:
– Depending on the bearing location, you may need to remove the brake caliper.
– Use the appropriate socket sizes to unbolt the caliper and hang it safely (do Not let it dangle from the brake line).
– Remove the brake disc (rotor) if necessary, which may involve removing additional bolts.
– **Remove Hub Assembly**:
– Depending on the vehicle’s design, you may need to remove the hub assembly if it houses the bearing.
– Use the socket set to remove the bolts securing the hub to the suspension components.
– **Remove the Old Wheel Bearing**:
– If the bearing is pressed into the hub, use a bearing puller to extract it carefully.
– Ensure that you do Not damage the hub during this process.
– **Clean the Housing**:
– Clean the bearing housing thoroughly with rags to remove any debris or old grease.
– Inspect the housing for any signs of damage or wear.
– **Install the New Wheel Bearing**:
– Apply a thin layer of grease to the new bearing.
– Carefully press or tap the new bearing into the hub, ensuring it is seated properly.
– If necessary, use a bearing installer tool to avoid damaging the bearing.
– **Reassemble the Hub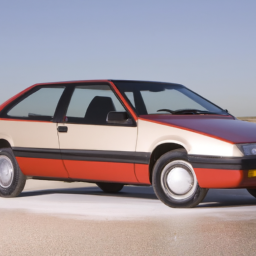 and Components**:
– Reattach the hub assembly to the suspension, tightening all bolts to the specified torque values.
– Reinstall the brake disc and caliper, ensuring all bolts are securely fastened.
– **Reattach the Wheel**:
– Place the wheel back onto the hub and hand-tighten the lug nuts.
– Lower the vehicle off the jack stands and then use the torque wrench to tighten the lug nuts to the manufacturer’s specifications.
– **Final Checks**:
– Spin the wheel to ensure it rotates freely without noise.
– Double-check that all components are reassembled correctly and securely.
– **Test Drive**:
– Take the vehicle for a short test drive to ensure everything is functioning properly and that there are no unusual noises coming from the wheel area.
### Safety Tips
– Always wear safety glasses and gloves to protect yourself from debris and sharp objects.
– Make sure the vehicle is securely lifted and supported before working underneath it.
– Dispose of the old bearing and any other waste materials properly.
By following these steps and using the right tools, you can successfully replace the wheel bearing on a Citroen BX.
A heat shield is a critical component in automotive design, engineered to protect various parts of a vehicle from high temperatures produced by the engine and exhaust systems. This protective device is typically made from materials that can withstand extreme heat, such as aluminum, stainless steel, or specialized heat-resistant composites. The primary function of a heat shield is to deflect or absorb heat, preventing it from transferring to sensitive components nearby, such as fuel lines, electrical wiring, and the vehicle’s body.
In vehicles, heat shields are strategically located around the exhaust system, particularly near the catalytic converter and exhaust manifold, where temperatures can soar. By maintaining a barrier between these hot components and other parts of the vehicle, heat shields help to reduce the risk of heat-related damage, fires, and ensure the safety and longevity of the vehicle’s overall performance.
Heat shields also play a vital role in enhancing vehicle efficiency. By controlling the temperature of the engine compartment, they contribute to optimal engine performance, fuel efficiency, and emissions reduction. In some cases, heat shields are designed to improve aerodynamics by streamlining airflow under the vehicle.
Overall, the heat shield is an essential element that safeguards against thermal damage and contributes to the vehicle’s reliability and efficiency, making it a vital component in modern automotive engineering.